Set up GetAStatic on Windows
Install WireGuard, import your config, turn it on, and check that websites see your static IP.
You need an active GetAStatic plan and a Windows account that can install apps. Screenshots are from Windows 11 and Chrome, taken on 14 October 2026.
Click what has an orange outline. The screenshots mark the same spot with an orange box.
Connect with WireGuard
Download WireGuard
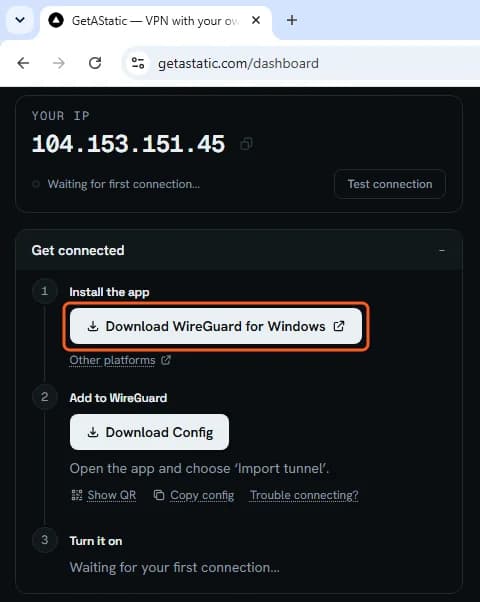
Sign in to your dashboard. On the Devices tab, under Get connected, step 1 Install the app, click Download WireGuard for Windows.
Open the installer
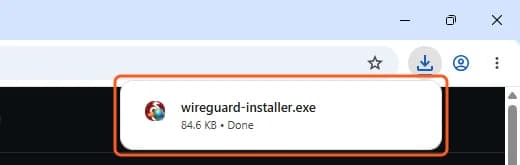
Click wireguard-installer.exe in Chrome's download list, at the top right.
Allow the install
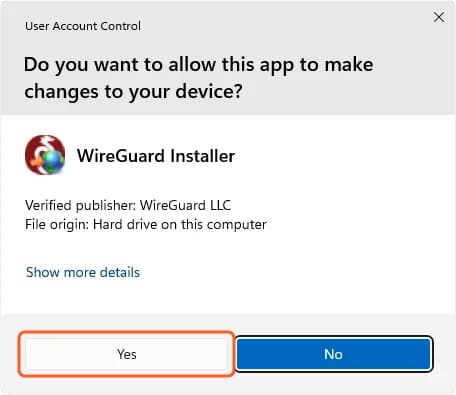
Windows asks Do you want to allow this app to make changes to your device? Make sure it says Verified publisher: WireGuard LLC, then click Yes. Windows shows no other warning. WireGuard installs and opens.
Download your config
Go back to the dashboard. Under step 2 Add to WireGuard, click Download Config. Chrome saves your config file, which ends in
.conf, to your Downloads folder.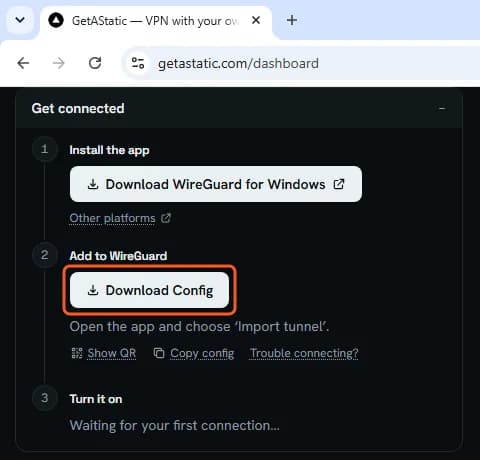
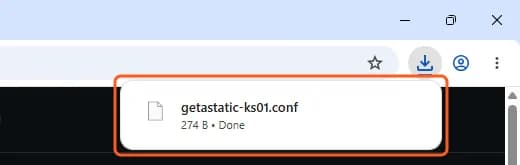
Import the config into WireGuard
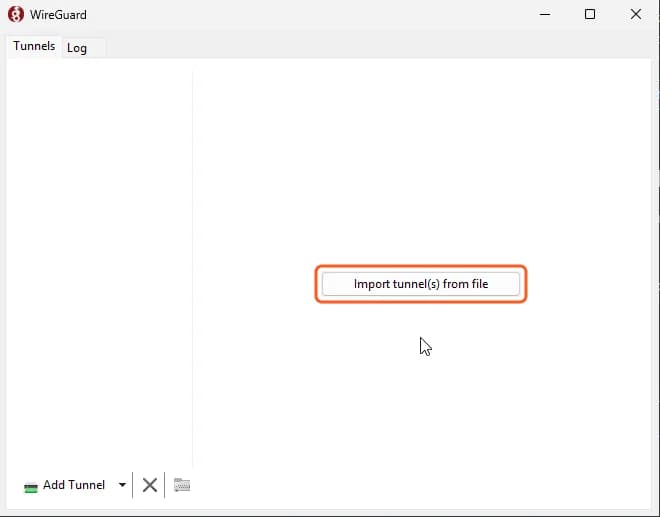
In WireGuard, click Import tunnel(s) from file.
Pick the file
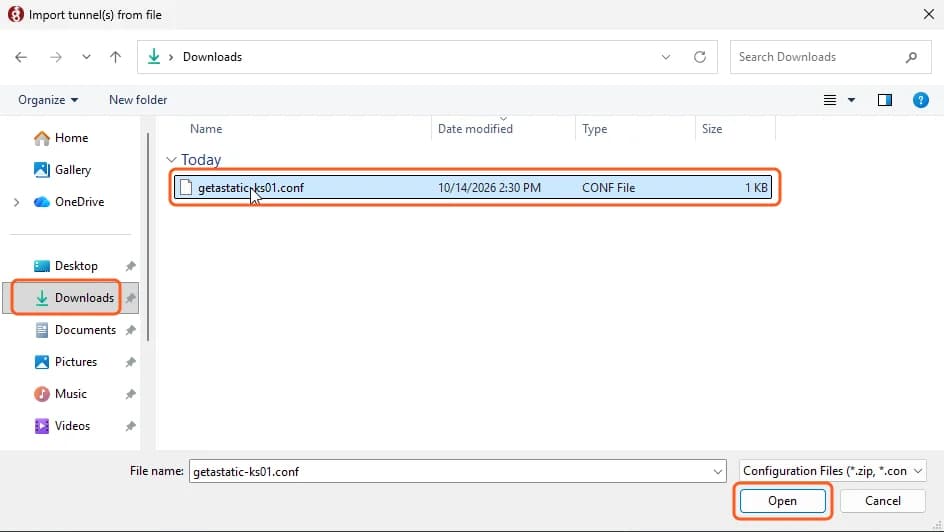
The window opens in Documents, not Downloads. Click Downloads on the left, select your config file, then click Open.
Turn it on
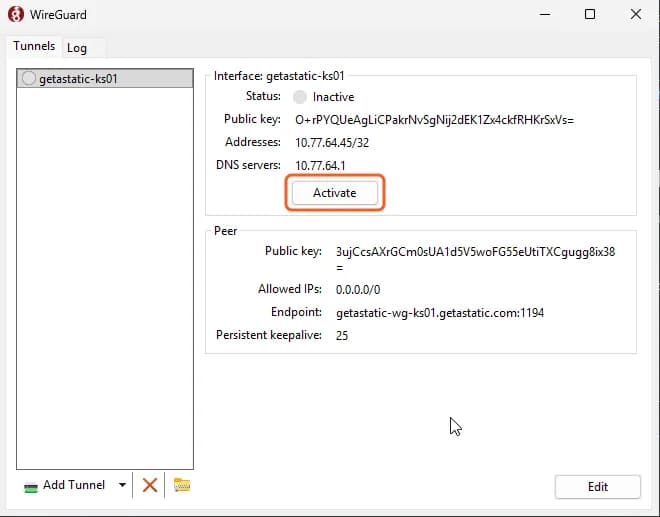
Your tunnel shows in the list. Click Activate.
Check WireGuard
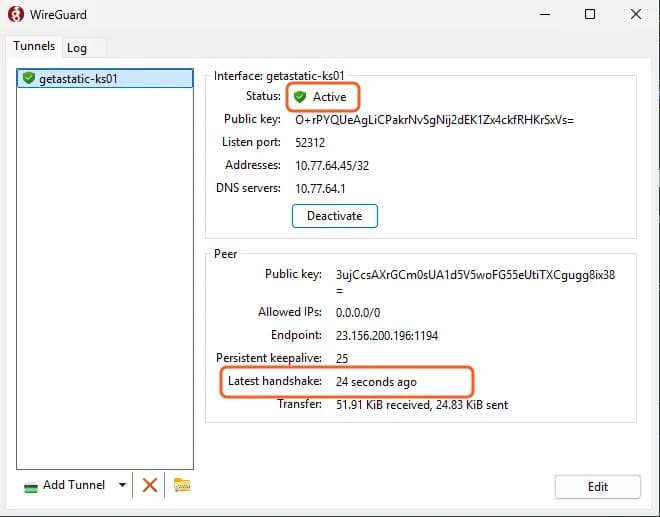
Status changes to Active, and Latest handshake shows a few seconds ago. A handshake means our server answers.
Check the dashboard
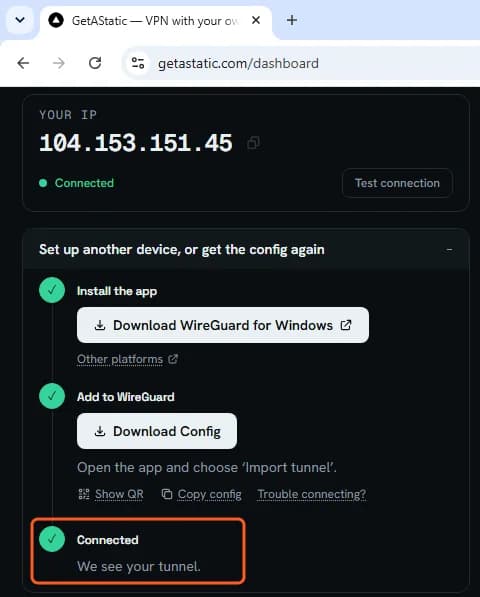
Step 3 changes to Connected: We see your tunnel.
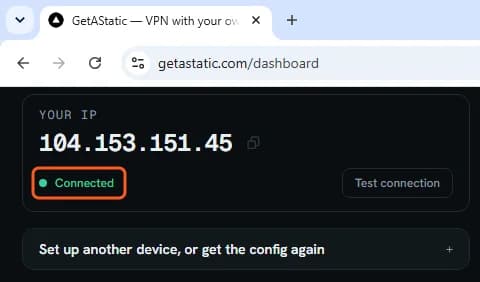
After you reload the page, the setup steps are closed. Connected under your IP tells you the same. To see the steps again, click Set up another device, or get the config again.
Check your static IP
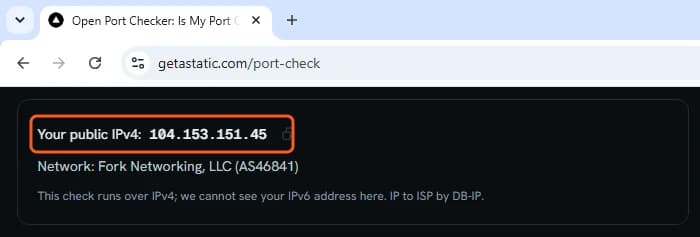
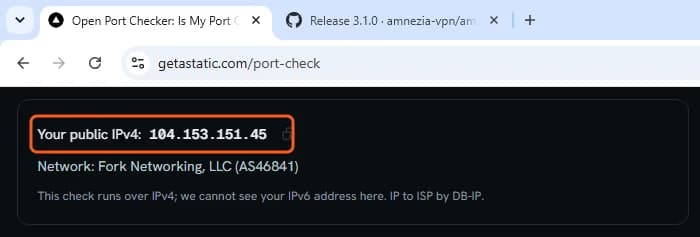
Open our open port checker. Your public IPv4 must be the IP on your dashboard. All your internet traffic now goes out from that IP.
Trouble connecting?
Some hotel, campus and mobile networks block UDP 1194, the port WireGuard uses by default. Use the same tunnel on UDP 443 instead.
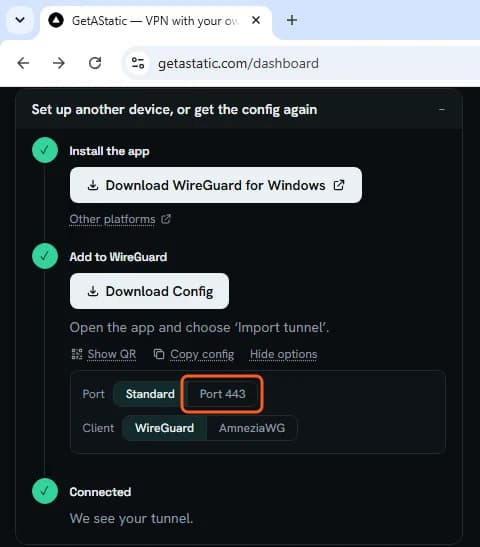
Choose Port 443
On the dashboard, under step 2, click Trouble connecting?, then Port 443.
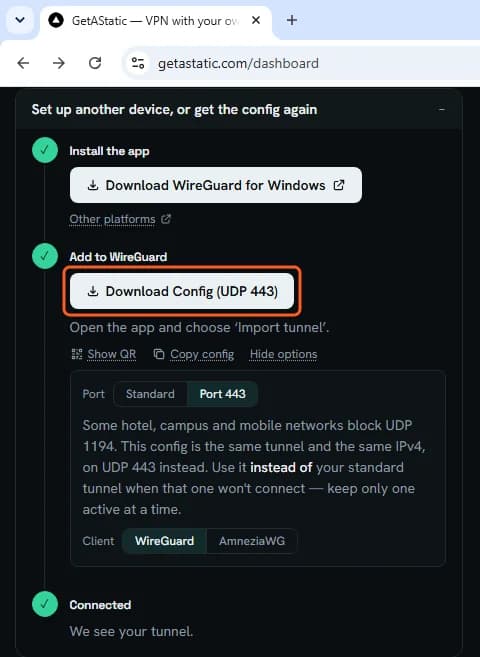
Download and import it
Click Download Config (UDP 443). Import that file into WireGuard the same way (WireGuard steps 5 to 7). Activate only one of the two tunnels at a time.
If WireGuard is blocked: AmneziaWG
Some countries and networks block WireGuard even on Port 443. AmneziaWG is WireGuard that is harder to detect. You keep the same IP. Each IP uses WireGuard or AmneziaWG, not both.
Turn off WireGuard first
In WireGuard, click Deactivate. If the tunnel is on when you switch, the switch stops your connection to the dashboard and the page does not finish. If that happens, deactivate WireGuard and reload the page.
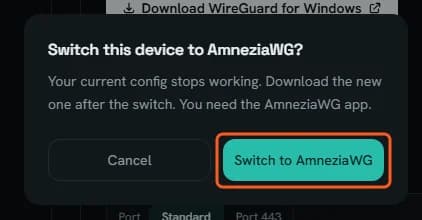
Switch to AmneziaWG
On the dashboard, click Trouble connecting?, then AmneziaWG next to Client, then Switch to AmneziaWG. Your WireGuard config stops working.
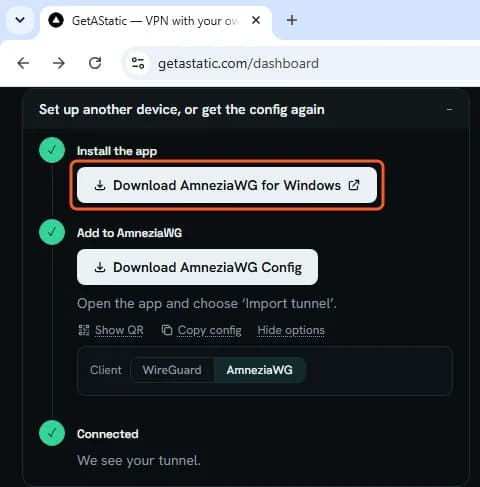
Download the AmneziaWG app
Step 1 now shows Download AmneziaWG for Windows. It opens the app's download page on GitHub.
Under Assets, click the file that ends in amd64-…msi. A PC with an ARM processor needs the
arm64file.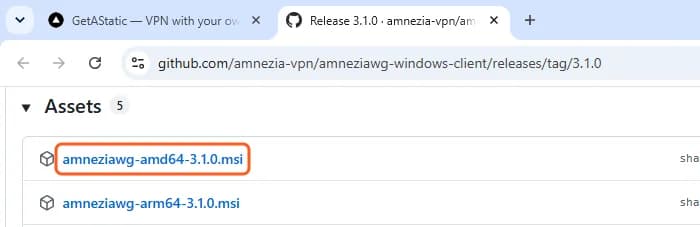
Install it
Open the
.msifile from Chrome's download list. Make sure Windows says Verified publisher: Privacy Technologies OU, then click Yes.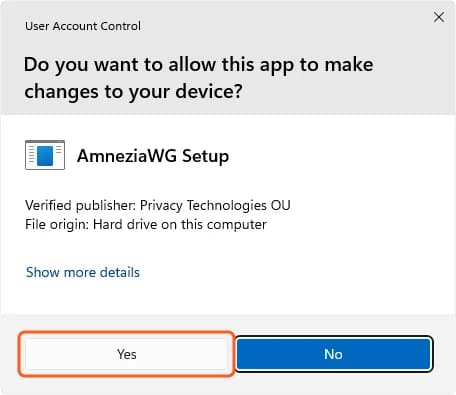
Download the AmneziaWG config
On the dashboard, under step 2 Add to AmneziaWG, click Download AmneziaWG Config. This file ends in
-awg.conf.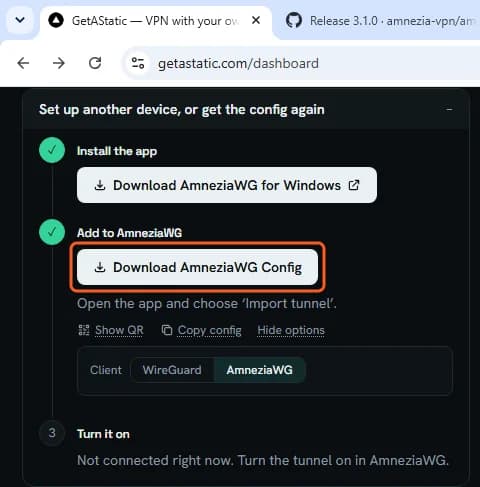
Import it and turn it on
In AmneziaWG, click Import tunnel(s) from file, then Downloads. Select the file that ends in
-awg.confand click Open. Then click Activate.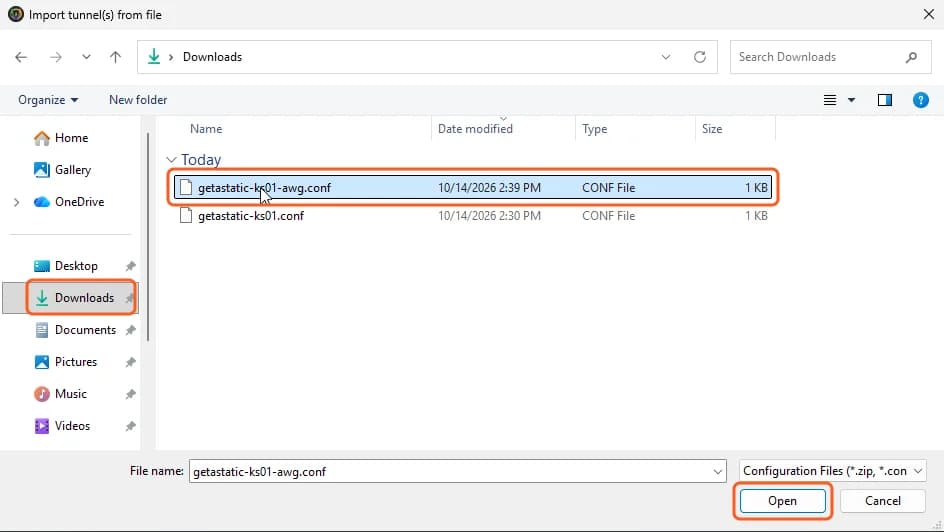
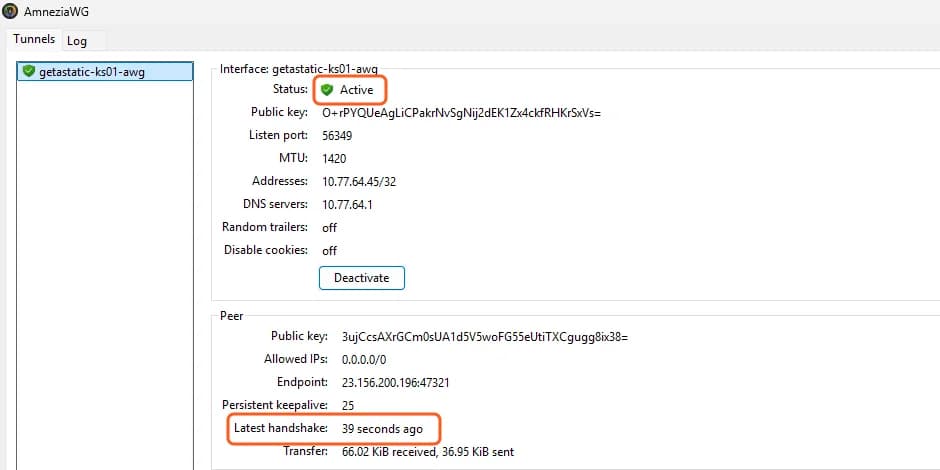
Check your static IP
The dashboard shows Connected again, and the open port checker shows the same IP as before.
To go back, click WireGuard next to Client. Your earlier WireGuard config works again.