Set up a Headscale exit node on your static IP
Add our exit node to the tailnet that your Headscale server runs, approve its exit route, and check that your devices reach the internet from your static IP.
GetAStatic is not affiliated with Headscale or Tailscale. The Headscale steps follow the Headscale docs. Overview and price: Headscale exit node.
Before you start
- An active GetAStatic plan. The exit node is an add-on for $5/mo per IP address.
- A shell on the Headscale server, to run the
headscalecommand. If Headscale runs in Docker, putdocker exec -it headscalein front of each command (use your container's name). - A Headscale server that is reachable from the internet over HTTPS. Our node connects to it from our host, like your own devices do when they are away from home.
- Devices that run the Tailscale app, signed in to your Headscale server.
Find your login server URL
It is server_url in Headscale's config.yaml, often /etc/headscale/config.yaml:
grep server_url /etc/headscale/config.yaml
It is the same URL that your devices use with --login-server, for example https://headscale.example.com. Use it exactly, with https://. An address like http://127.0.0.1:8080 or a LAN address cannot work: our node connects over the internet.
Create a pre-auth key
Pick the user
The exit node joins as a node of one Headscale user. List them:
headscale users list
To keep the exit node apart, create a user for it first, for example
headscale users create getastatic.Create the key
headscale preauthkeys create --user USER_ID
Use the user's ID from the list. Older Headscale versions take the user name instead. The default key is single-use and valid for one hour, which is enough: we use it within minutes. Do not add
--ephemeral: Headscale deletes an ephemeral node after it is offline for a while, and it cannot rejoin without a new key. Copy the key that the command prints.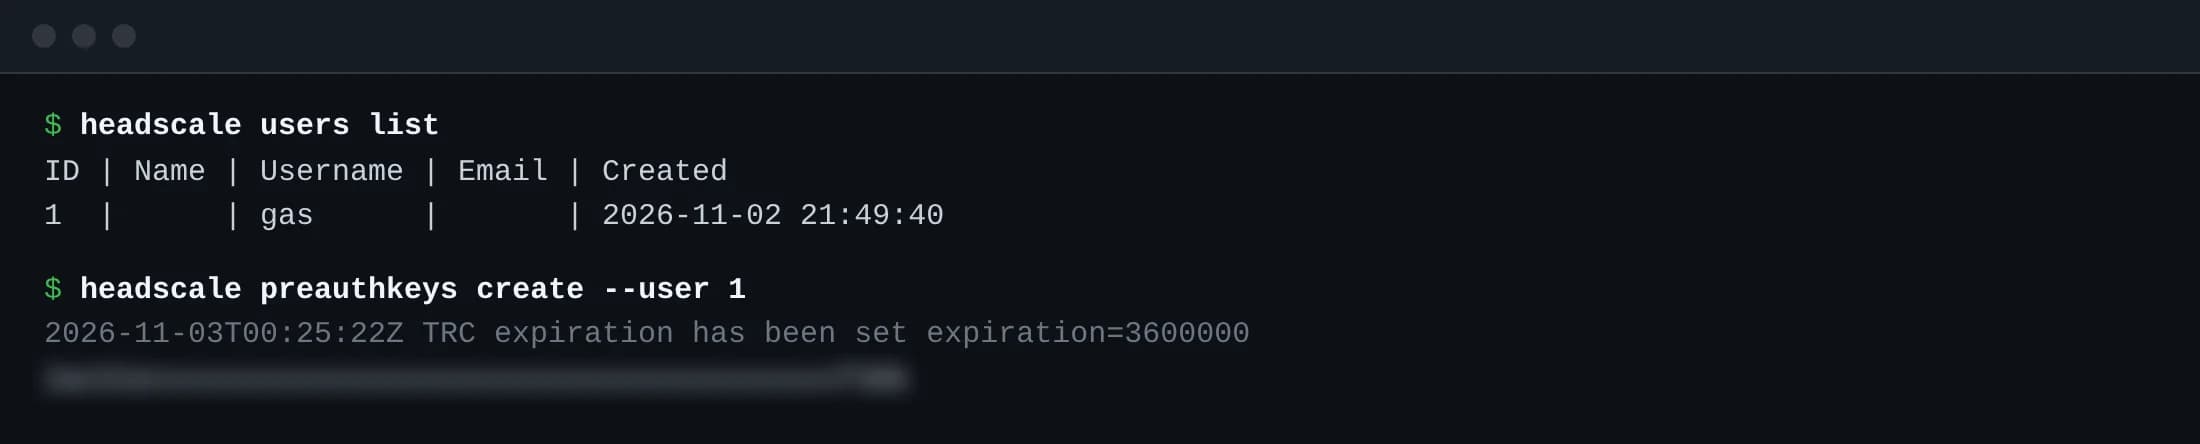
Add the exit node in your GetAStatic dashboard
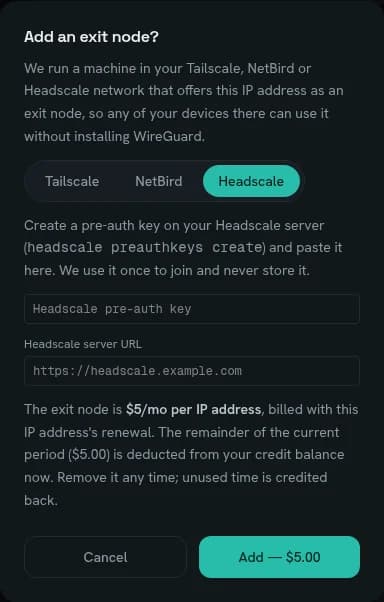
Paste the key and the URL
Sign in to your dashboard. On the My IPs tab, select the IP that the exit node will use and click IP settings. In the Exit node row, click Unlock, choose Headscale, and paste the pre-auth key and your login server URL. Confirm. The first charge is prorated from your credit balance. We use the key once and do not store it.
Wait for the node
The row shows Setting up… for a few minutes. Then the node, such as
getastatic-203-0-113-10, shows as online in:headscale nodes list
Approve the exit route
Our node offers itself as an exit node, but Headscale does not route traffic through it until you approve that route.
Find the node's ID
headscale nodes list-routes
The
getastatic-203-0-113-10line shows0.0.0.0/0, ::/0as its available routes, and its ID.Approve it
headscale nodes approve-routes --identifier NODE_ID --routes 0.0.0.0/0,::/0
Run
headscale nodes list-routesagain: the route now shows as approved. Older Headscale versions useheadscale routes listandheadscale routes enable -r ROUTE_IDinstead.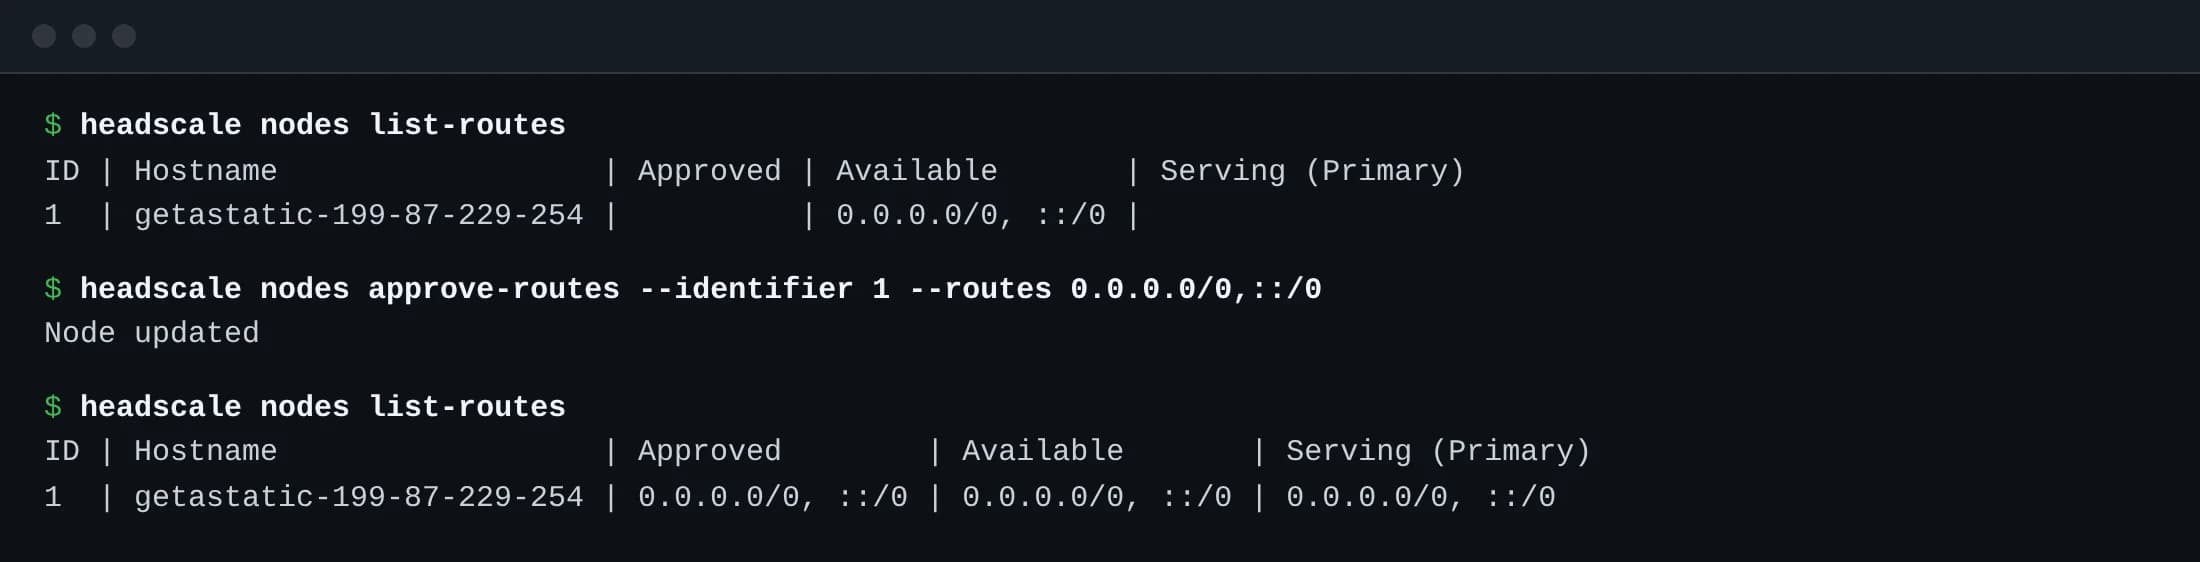
Optional: approve it automatically
An
autoApproversrule for exit nodes in your Headscale policy approves the route without this step. See Headscale's routes documentation.
Check it works
Select the exit node on a device
In the Tailscale app, open Exit node and select
getastatic-203-0-113-10. On Linux:sudo tailscale set --exit-node=getastatic-203-0-113-10

Check the IP
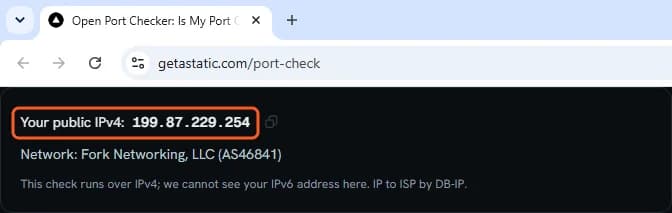
On that device, open an IP check site, such as our connection check. It must show the static IP from your dashboard. From a terminal:
curl -4 https://getastatic.com/api/tools/ip
If it does not work
- The key is rejected: a pre-auth key is valid for one hour and for one use by default, so it may have expired or been used. Check the login server URL too. Create a new key, then select Retry with a new key in the Exit node row. A retry costs nothing extra.
- The node never shows up: check that the login server URL opens from outside your network, for example from a phone on mobile data.
- You cannot select the exit node: approve its route (above).
- No internet after you select it: check that
headscale nodes listshows the node online andheadscale nodes list-routesshows the route approved. If your Headscale policy limits access, it must let the device use exit nodes: a rule with the destinationautogroup:internet:*. To get back online meanwhile, select None in the app's Exit node menu. - Kill switch: the exit node never sends your traffic out from another address. If its tunnel to your static IP is down, it drops the traffic. A device that keeps the exit node selected has no internet until it is back, or until you select None.
- Printers and other local devices stop working: turn on Allow Local Network Access in the Exit node section of the Tailscale app on that device.
- Exit nodes are temporarily unavailable: our exit node host is full. We email you when a slot opens.
Still stuck? Ask on the Support tab of your dashboard, and include the output of headscale nodes list-routes. Do not send a pre-auth key that is still valid.